Email Settings
On this page, you can configure your email settings. Do this by following the steps below:
-
Log in to NAKIVO Backup & Replication.
-
Click Settings in the left pane of the product.
-
Go to the General tab.
-
Click Email Settings to configure email settings on the page that opens.
Important
If you use an email with two-factor authentication, grant access permissions to NAKIVO Backup & Replication via your account security settings and generate a unique password. When configuring email setting of the product, enter this password in the SMTP password box.As an example, use instructions for Google accounts provided in the Using Email with Two-Factor Authentication section below.
-
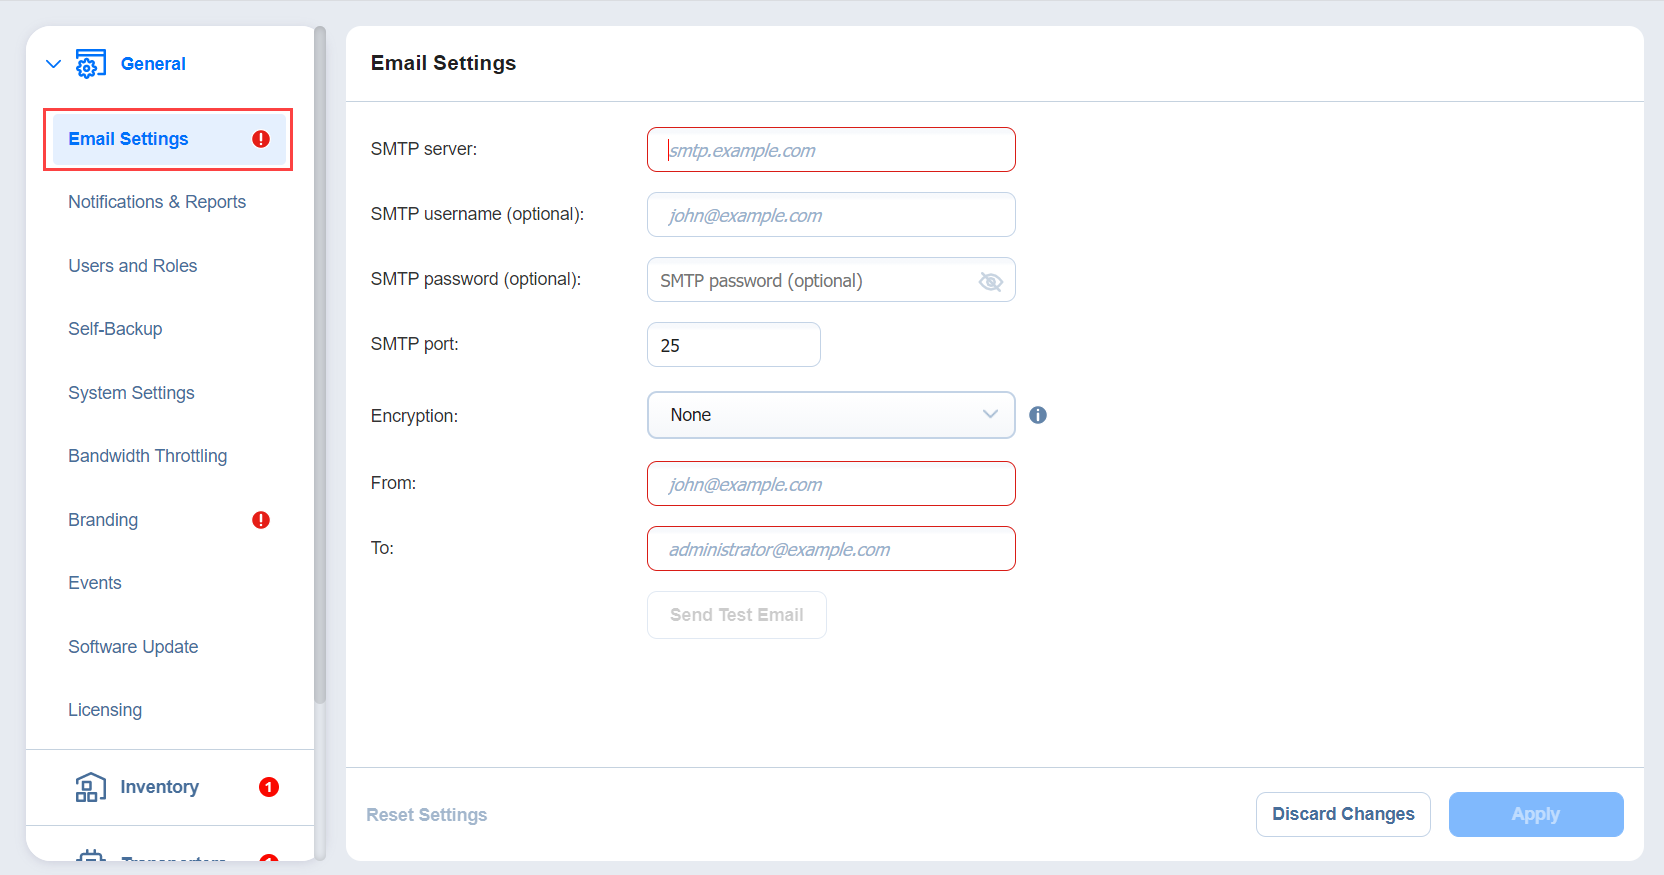
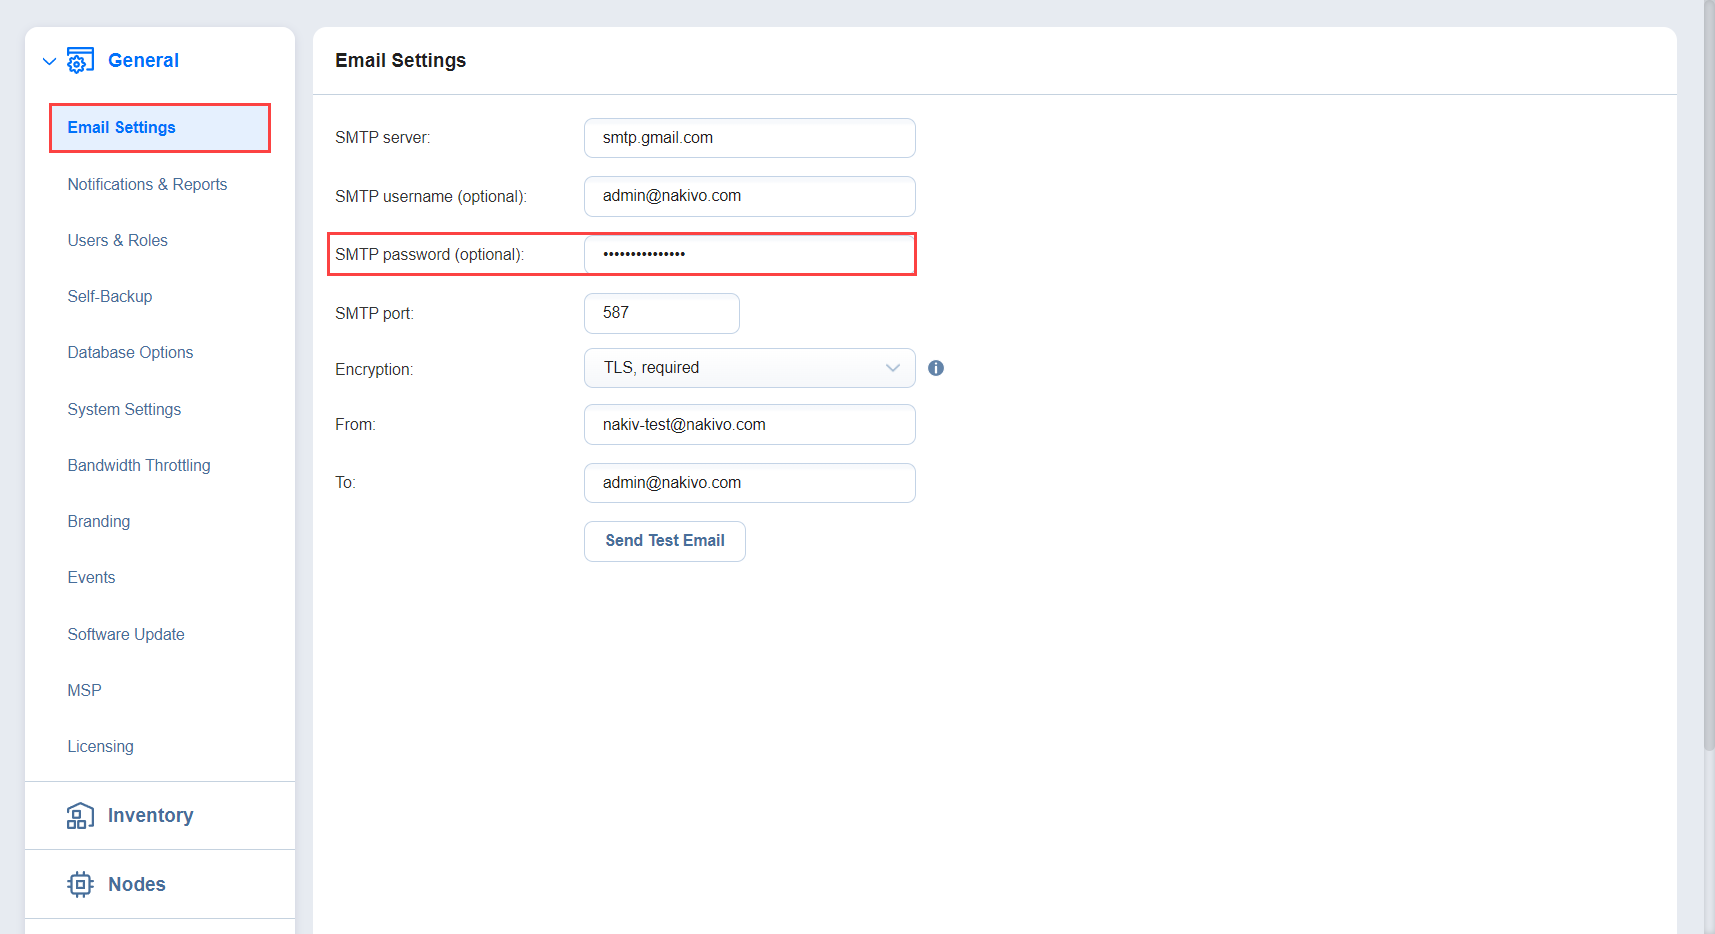
To set email settings, fill out the fields in the Email settings section:
-
SMTP server: The address of the server responsible for sending emails.
-
SMTP username: The username on the server (usually the same as the email username).
-
SMTP password: Usually the same as the password to your email.
-
SMTP port: Depends on encryption type.
-
Encryption: Select the type of encryption:
-
None: Always use a plaintext connection. Not recommended.
-
TLS, if possible: Start with plaintext, then use
STARTTLSto switch to secure connection if supported by the server. -
TLS, required: Start with plaintext, then use
STARTTLSto switch to secure connection; drop the connection if not supported by the server. -
SSL, required: Use the SSL-encrypted connection.
-
-
From: Specify the sender email address
-
To: Specify the receiver email address
Click Send Test Email to verify that the settings are correct.
-
-
Click Apply to save the settings.
-
Alternatively, click Discard Changes to discard any changes you have made to the email configuration.
-
Optionally, click Reset Settings to return all the settings to their default values.
Using Email with Two-Factor Authentication
Many email providers require that the third-party apps or devices use two-factor authentication to sign into their accounts. Therefore, for correct email notification setup, you must grant access permissions to NAKIVO Backup & Replication via your account security settings and generate a unique SMTP password.
As an example, you can follow the instructions for setting up a Gmail account notifications below:
-
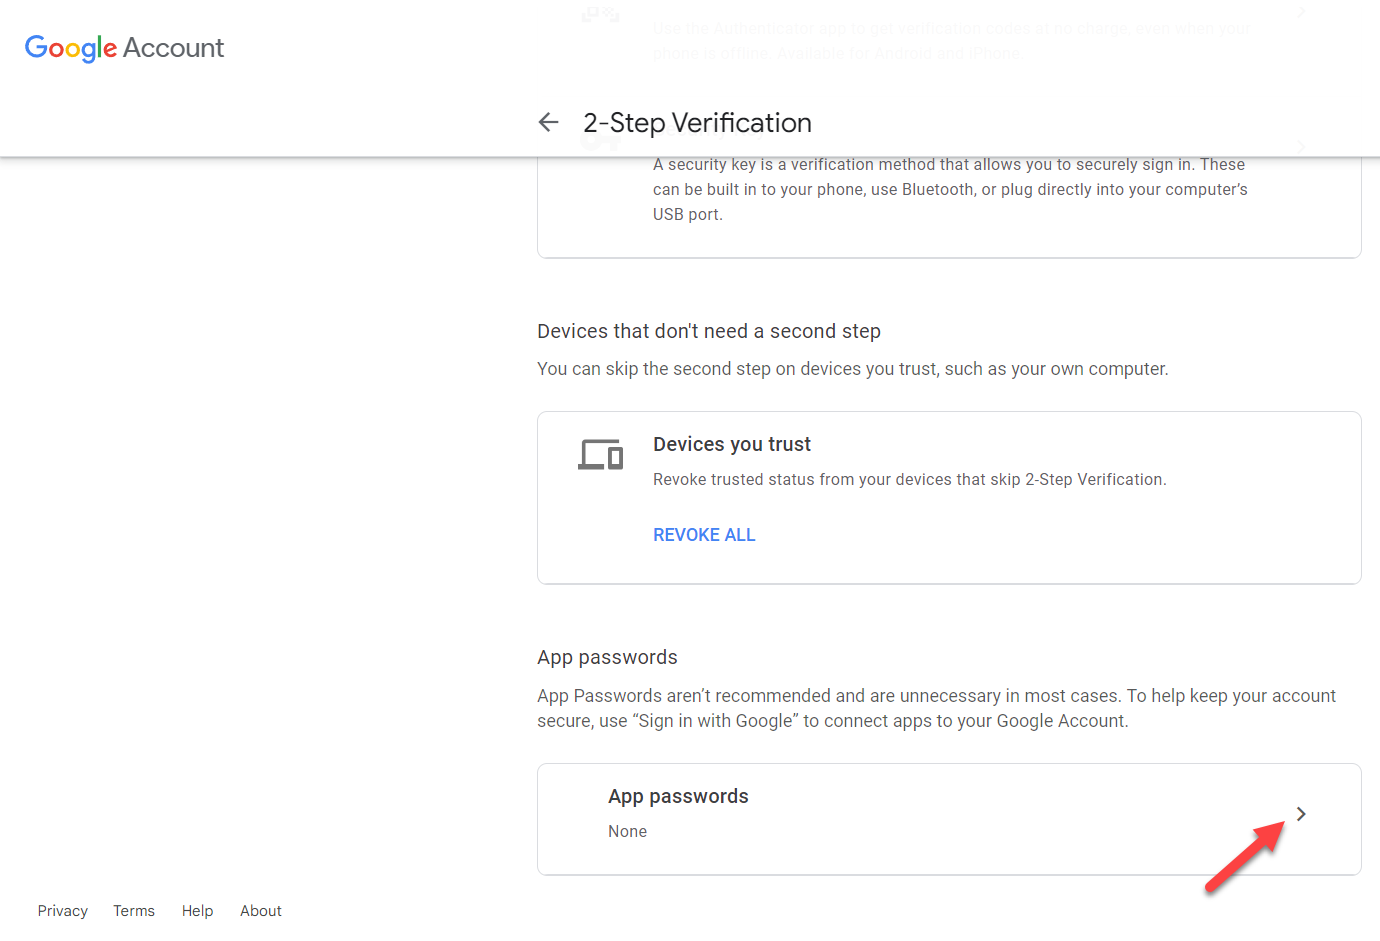
Log into your Google account and allow 2-step verification (you will be asked to complete a second step to verify it’s you when you sign in):
-
Scroll down to the App passwords section and click the arrow button to proceed with the password.
-
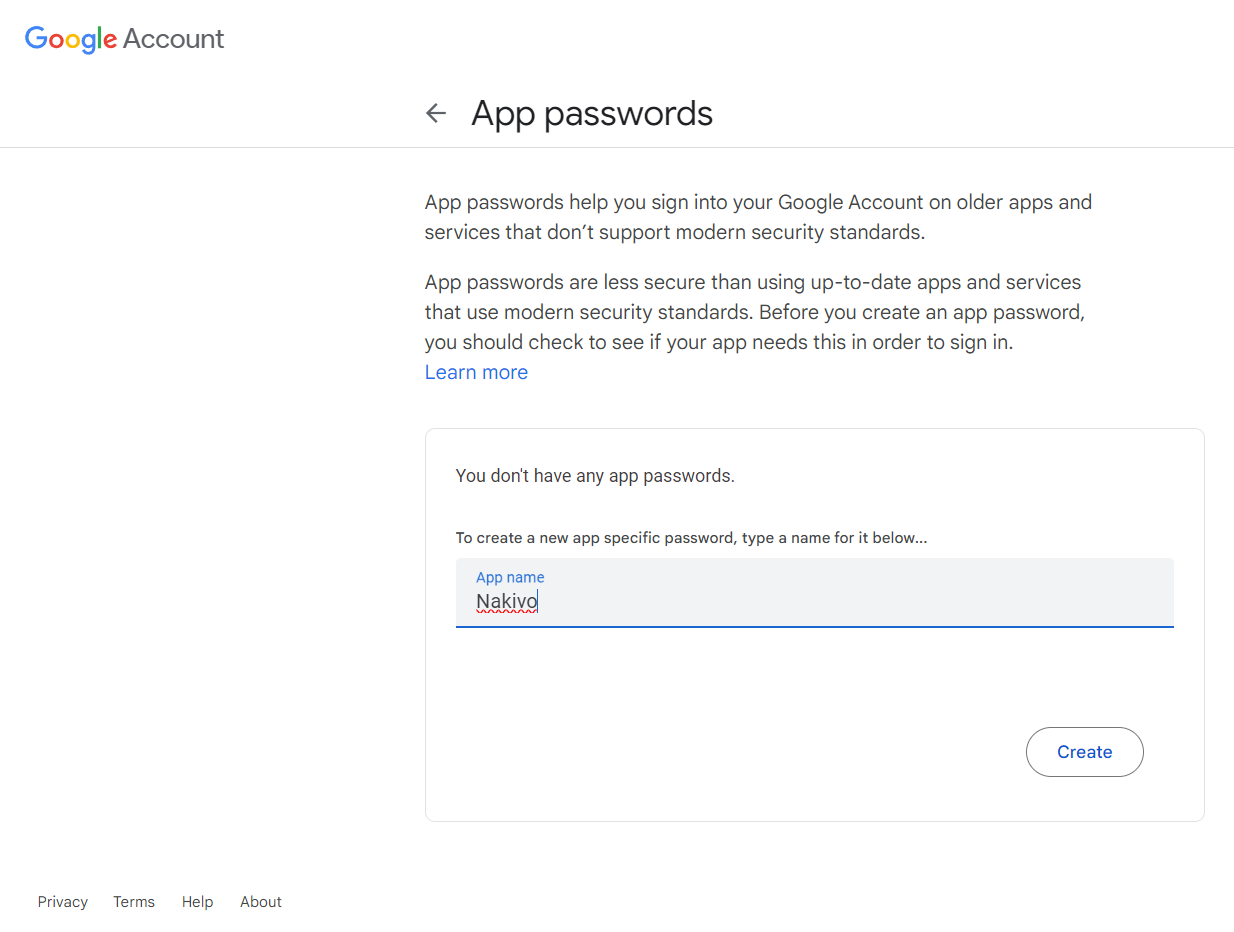
Type your app name and click Create to generate the password.
-
Now, copy the generated password and paste it into the SMTP password field in the Settings > General > Email Settings tab.


