Deploying Transporter as Nutanix AHV Appliance
To enable NAKIVO Backup & Replication to create and run jobs within a Nutanix AHV cluster, a dedicated Transporter must be deployed as a Nutanix appliance in that cluster.
Please follow the steps below to add a transporter as a Nutanix appliance:
-
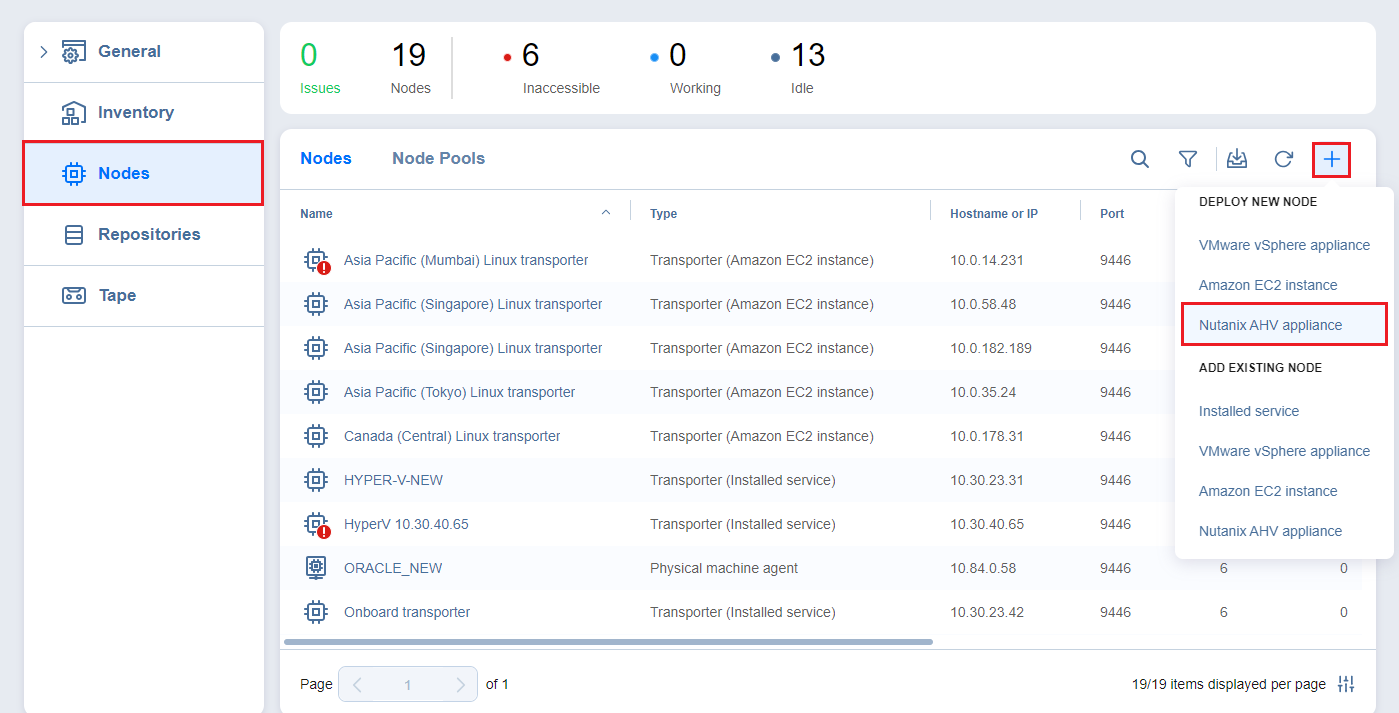
Click Settings in the left pane of the product, go to the Nodes tab, and click + .
-
In the Deploy New Node section, click Nutanix AHV appliance.
-
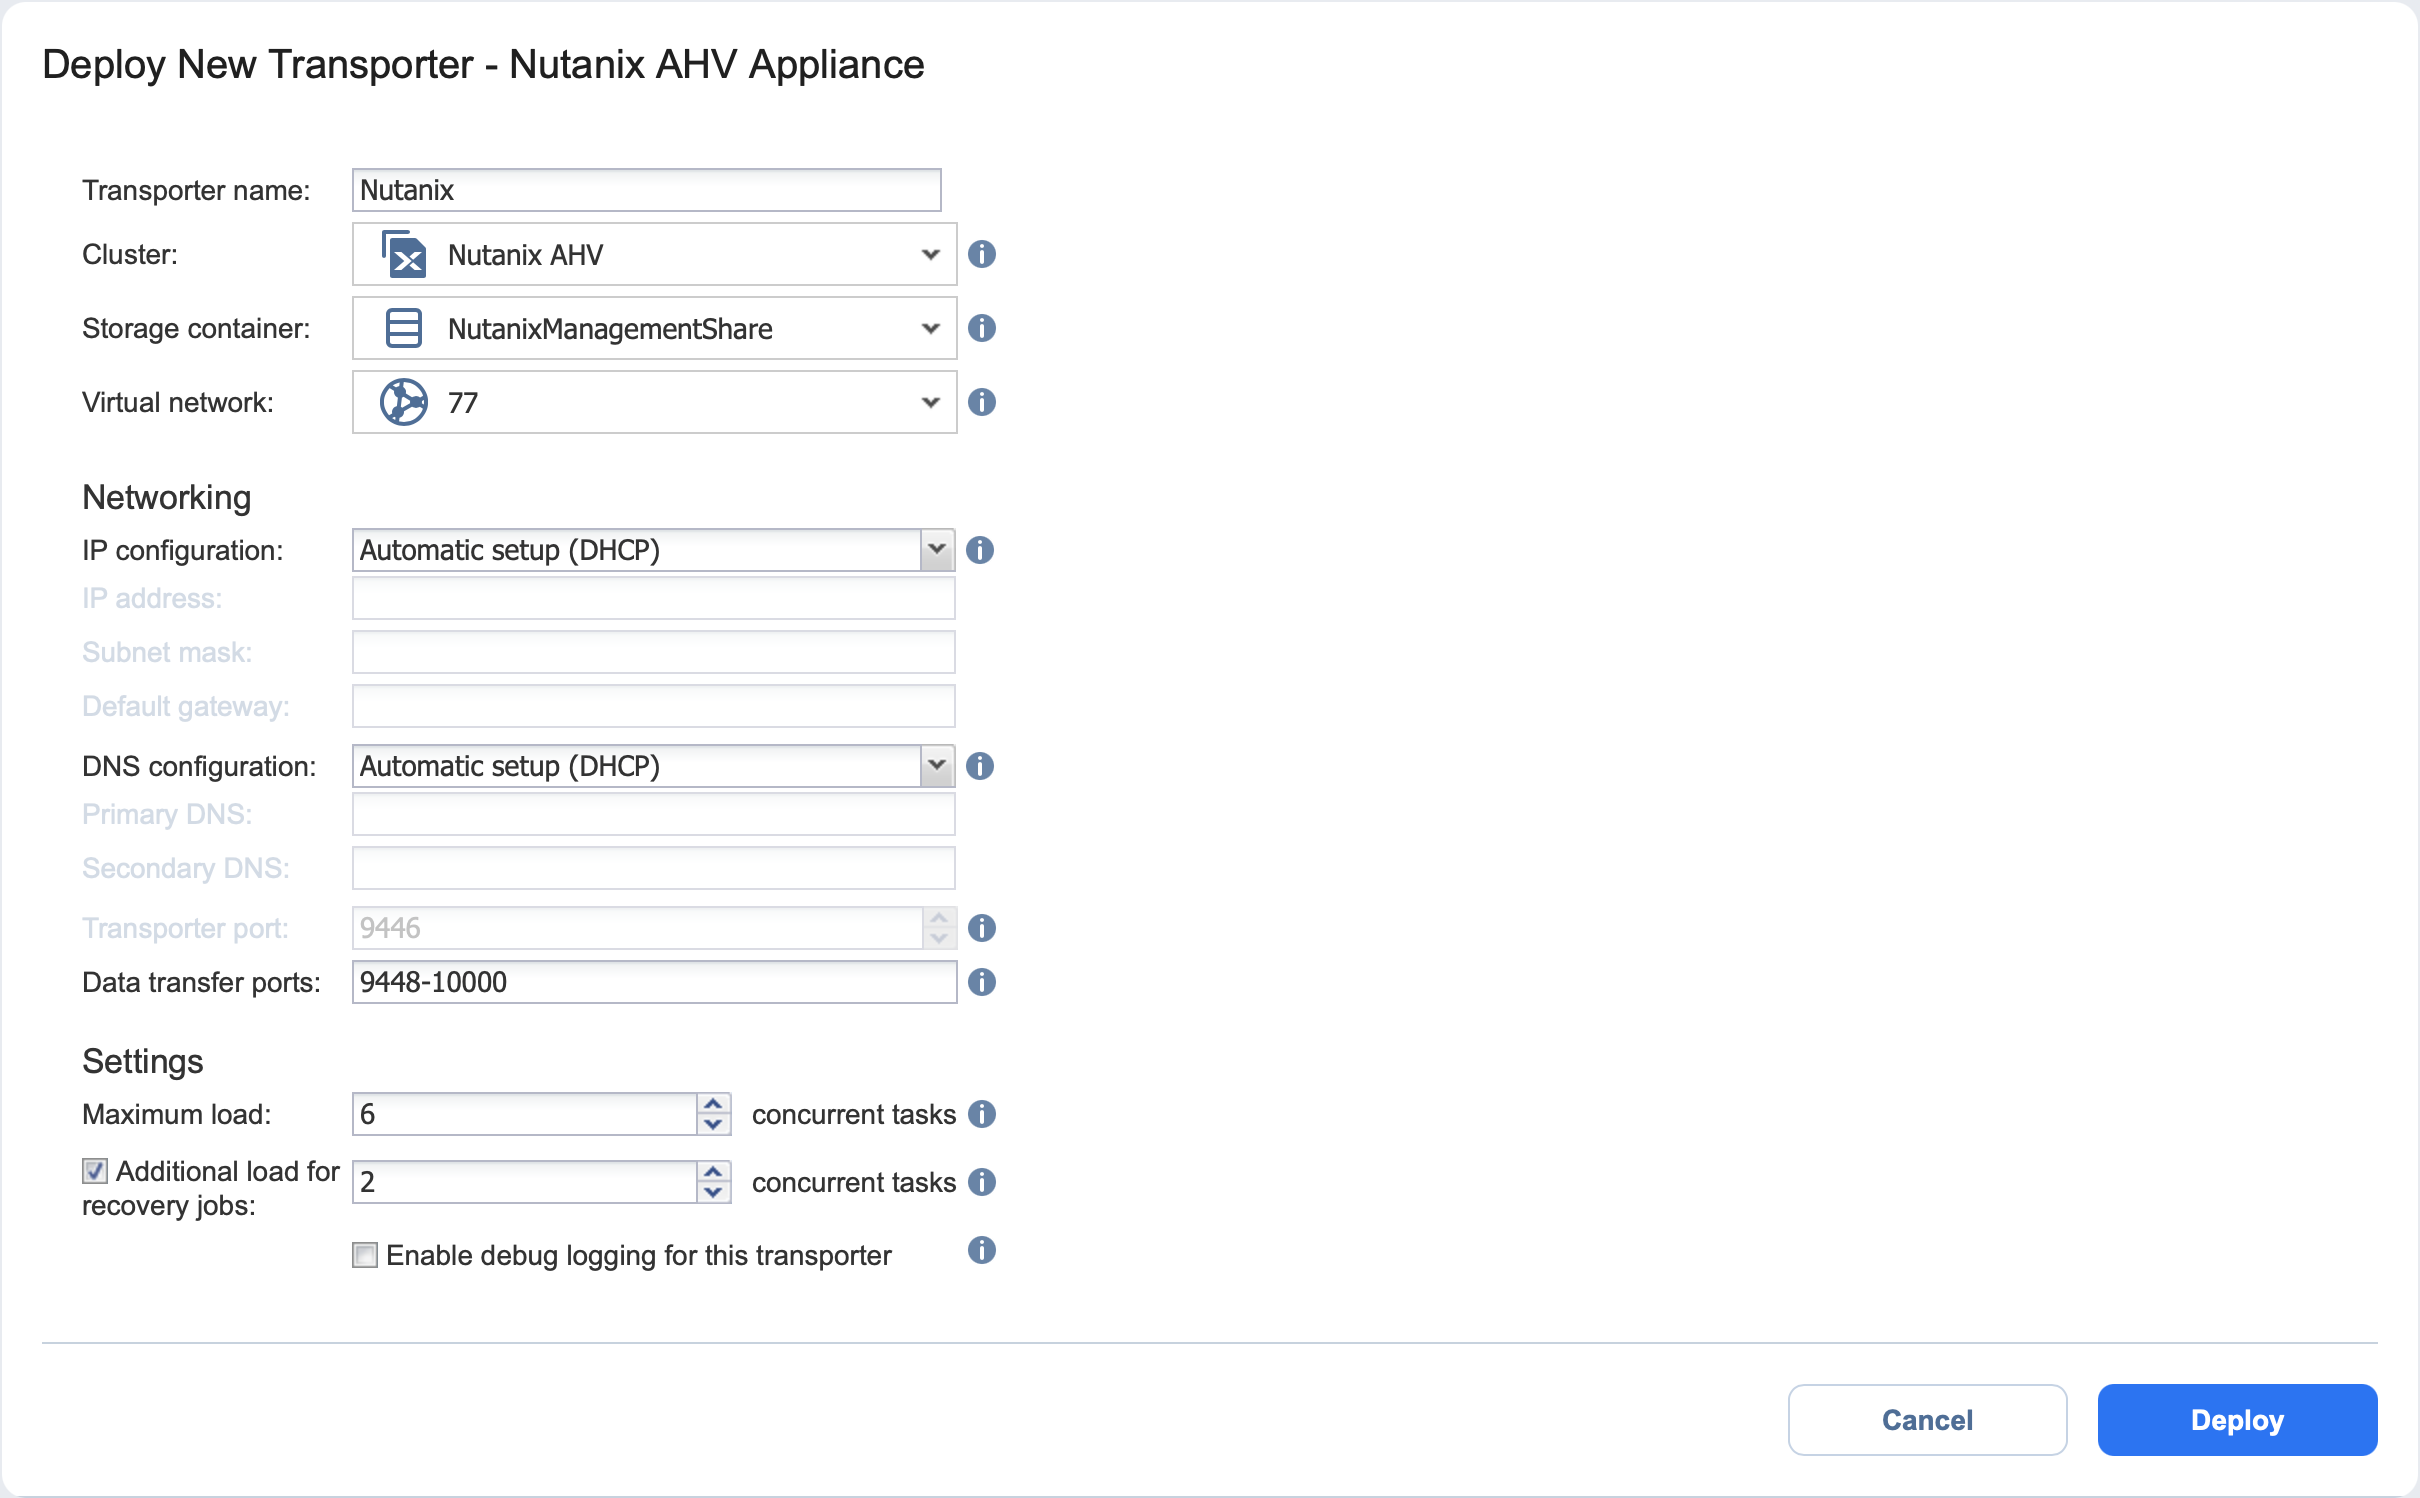
In the Deploy New Transporter - Nutanix AHV Appliance dialog, specify the following options:
-
Transporter name: Enter a name for the new Transporter.
-
Cluster: Select a cluster where the transporter VM will run.
-
Storage container: Select a storage container where the transporter VM will be located.
-
Virtual network: Select a virtual network where the transporter VM will be connected.
-
-
Click Deploy to proceed with the automatically selected networking options and default Transporter load configuration.
-
Alternatively, click More options if you wish to manually set the following options:
-
IP configuration: Can be either Automatic setup (DHCP) or Manual setup. With manual setup selected, specify an IP address, Subnet mask and Default gateway.
-
DNS configuration: Can be either Automatic setup (DHCP) or Manual setup. With manual setup selected, specify Primary and Secondary DNS.
-
Transporter port: Enter a communication port for your Transporter.
-
Data transfer ports: Enter a port range that will be used by your Transporter for actual data transfer.
-
Maximum load: Specify the maximum number of tasks that the Transporter should process simultaneously. A task, for example, is a backup or replication of a single VM disk, or one granular recovery session.
-
Additional load for recovery jobs: If selected, the specified quantity of tasks will be added to set the maximum Transporter load to be used for recovery jobs exclusively. This allows for running the specified amount of concurrent recovery jobs along with other types of jobs without the need to wait for their completion.
-
Enable debug logging for this transporter: If needed, enable debug level logging for the current transporter. Using this option on a permanent basis is not recommended.
-
-
Click Deploy to begin the deployment process. Successfully deployed transporters are displayed in the Transporters tab.

